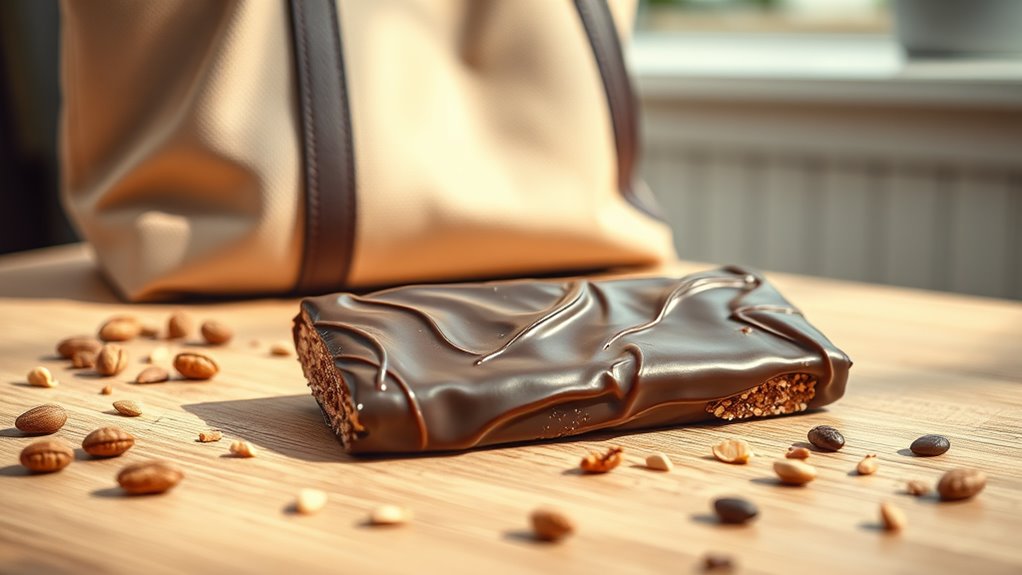
Transform Your Snacks With These Homemade Protein Bars!
Elevate your snacking by crafting homemade protein bars tailored to your personal health goals and flavor preferences. Start by selecting high-quality ingredients, and mix them using simple kitchen tools to create bars that are packed with nutrients and free from unwanted preservatives. Whether you prefer them sweet, crunchy, or nutty, you can customize your bars to fit your dietary needs. Explore different flavors and textures, and find out just how satisfying your snack time can become!
Key Takeaways
- Customize homemade protein bars with high-quality proteins and natural sweeteners to suit dietary needs and fitness goals.
- Enhance flavor and texture by adding a mix of crunchy nuts, chewy fruits, and whole grains.
- Opt for natural sweeteners like honey or maple syrup to improve taste without refined sugars.
- Store protein bars properly to maintain freshness and make large batches for convenient, healthy snacking.
- Pair homemade protein bars with fruits or yogurt for a nutritious snack that supports sustained energy and muscle repair.
The Benefits of Homemade Protein Bars
While store-bought options are readily available, making your own protein bars at home offers significant advantages. You’re not just crafting a snack; you’re engineering a transformation in your nutritional habits. When you take charge of your snack preparation, you’re tailoring each ingredient to suit your fitness goals and dietary needs, ensuring every bite is packed with the best fuel for your body. This isn’t merely about saving money—it’s about optimizing your nutritional intake without the added preservatives found in commercial products. By formulating your own protein bars, you effectively transform your grab-and-go snacks into a powerhouse of tailored nutrients that support your health vigorously, aligning precisely with your wellness objectives. Embrace this mastery over your diet; reinvent your snacking habits to propel your health forward.
Additionally, preparing protein bars at home allows for versatile customization, enabling you to experiment with flavors and ingredients that elevate your palate while fueling your body.
Choosing the Right Ingredients
Why settle for anything less than the best when choosing ingredients for your homemade protein bars?
You’re aiming for optimal nutrition and flavor, so select high-quality, whole food sources. Opt for raw or minimally processed nuts and seeds to ensure you’re getting the full spectrum of healthy fats and proteins.
When it comes to sweeteners, honey or pure maple syrup are superior choices for their nutrient content over refined sugars. Choosing organic and non-GMO ingredients can also make a difference in both health impact and taste quality.
For protein, consider a high-quality whey isolate or, if vegan, a blend of rice and pea protein to hit a complete amino acid profile.
Your choices matter deeply, refining your bars to perfection.
Experiment with adding fiber-rich oats or chia seeds to not only boost the fiber content but also improve the bar’s texture and satiety factor.
Essential Tools for Protein Bar Preparation
To make your own protein bars, you’ll need several key tools that ensure the process is smooth and the results professional.
First, invest in a durable food processor or high-powered blender; it’s essential for blending nuts, oats, and protein powder into a fine, consistent mixture.
You’ll also need measuring cups and spoons for precise ingredient portions—accuracy is crucial for balanced nutrition and taste.
Additionally, consider silicone molds or a standard baking sheet paired with parchment paper, both options streamline shaping and removal.
Rubber spatulas will help you scrape and spread the mixture evenly.
Lastly, a sharp knife or pizza cutter will enable clean, uniform cuts.
Equip yourself accurately to master the craft of homemade protein bars.
For those conscious about nutrition, understanding balanced nutrition ensures your homemade bars are both tasty and beneficial.
Step-by-Step Guide to Making Protein Bars at Home
Now that you’ve got the necessary tools, let’s get into making your own protein bars.
You’ll start by selecting suitable ingredients that cater to your nutritional needs and taste preferences.
Next, you’ll mix and prepare the base, then cut and properly store your bars for easy snacking.
These bars not only provide great taste but are also a nutritious snack that can be tailored to suit various dietary requirements.
Selecting Your Ingredients
Before diving into the actual preparation of your homemade protein bars, it’s crucial that you carefully select high-quality, nutrient-dense ingredients.
Start with a solid protein base—whey, pea, or rice protein powders are excellent options, depending on your dietary preferences. Opt for natural sweeteners like honey, maple syrup, or agave to enhance flavor without the spike in artificial sugars.
Incorporate oats or quinoa flakes for texture and sustained energy release. Don’t overlook the importance of healthy fats; nuts, seeds, or natural nut butters can boost the satiety factor.
Lastly, consider adding dried fruits or dark chocolate chips for a touch of sweetness and antioxidants, but be mindful of their sugar and calorie content. Choose wisely to craft a balanced, nutritious snack.
Mixing and Preparation
Once you’ve chosen your high-quality ingredients, it’s time to begin the process of making your homemade protein bars.
Start by combining your primary sources of protein—like whey or pea protein powder—with a binding agent such as almond butter or honey in a large mixing bowl. Ensure these base components blend thoroughly to form a consistent texture, crucial for the structural integrity of your bars.
Next, fold in dry ingredients like oats or quinoa flakes, along with any flavor enhancers—vanilla extract, cocoa powder, or cinnamon.
Mix steadily to distribute these evenly throughout. Once your mixture achieves a sticky, cohesive mass, transfer it to a lined baking sheet, pressing down firmly to form an even layer, ready for the subsequent chilling phase.
Cutting and Storing Bars
After your protein bar mixture has chilled and solidified, it’s time to cut it into bars. You’ll want to ensure precision and maintain the nutritional integrity of each serving.
Here’s how you can master the cutting and storing process:
-
Use a Sharp Knife: A sharp chef’s knife ensures clean cuts without crumbling the bars.
-
Measure for Uniformity: Use a ruler to measure and mark each bar to ensure all pieces are equally sized, optimizing nutritional consistency.
-
Wax Paper Separation: Stack bars between pieces of wax paper in your storage container to prevent them from sticking together.
-
Cool Storage: Store your bars in a refrigerator or cool, dry place to maintain freshness and preserve the texture.
Tips for Adding Flavor and Texture
You’ll want to focus on selecting quality ingredients to ensure your homemade protein bars don’t just pack a nutritional punch, but also taste great. Experimenting with different textures can make each bite more interesting, whether it’s adding crunchy nuts or chewy dried fruit. Additionally, opting for natural sweeteners like honey or agave can enhance the flavor without loading up on refined sugars. Incorporate minimal ingredients to keep your preparation simple and your pantry uncluttered.
Selecting Quality Ingredients
Choosing high-quality ingredients is essential when making homemade protein bars, as they significantly enhance both flavor and texture.
You’ll want to select components that not only taste great but also contribute to the nutritional profile you’re aiming for. Here are some key tips:
-
Opt for natural sweeteners: Use raw honey or pure maple syrup for a touch of natural sweetness.
-
Choose raw nuts and seeds: These provide a satisfying crunch and are packed with essential fatty acids.
-
Incorporate high-quality protein: A good protein powder is crucial; whey or pea protein are excellent choices.
-
Select whole, unprocessed grains and oats: These will improve the texture and boost the fiber content of your bars.
Use these guidelines to create a truly superior snack.
Mixing Textures Creatively
While selecting your ingredients, consider the impact of mixing textures to elevate both the flavor and the feel of your homemade protein bars. Incorporate ingredients like crunchy nuts or seeds alongside soft dried fruits to create a delightful contrast in each bite.
Opt for a variety of grains such as quinoa puffs or crispy rice to provide a surprising crunch that’s not only satisfying but also aids in a more complex eating experience.
You can also layer your textures; perhaps start with a smooth nut butter base, followed by layers of chopped nuts, oats, and coconut flakes, finishing with a sprinkle of chia seeds on top.
This stratification not only adds visual appeal but ensures every mouthful is uniquely satisfying.
Enhancing With Natural Sweeteners
After exploring how textures contribute to your protein bars, consider the role of natural sweeteners that can further enhance flavor and add their own textures.
Integrating these sweeteners not only elevates taste but also impacts nutritional value positively:
-
Dates: Blend them for a smooth, caramel-like sweetness that complements nuts and seeds.
-
Raw honey: A touch adds mild floral notes and a slight chew, perfect for binding ingredients.
-
Maple syrup: Its distinct, earthy sweetness pairs well with darker chocolates, enhancing complexity.
-
Coconut sugar: This provides a crunchy texture and a rich, caramel flavor that works well with spices like cinnamon.
Choose these to not just sweeten, but also to infuse rich, natural flavors into your bars.
Nutritional Advantages of Protein Bars
Although they seem simple, homemade protein bars pack a powerful nutritional punch that can significantly enhance your diet. These bars are dense sources of high-quality protein, essential for muscle repair and growth.
When you make your own, you control the ingredients, ensuring no unnecessary additives or excessive sugars temper with their purity. You’re also able to incorporate whole, unprocessed ingredients like nuts, seeds, and oats, boosting your intake of healthy fats and fiber. This aids in prolonged energy release and satiety, curbing hunger longer than most store-bought alternatives.
Furthermore, these bars can seamlessly integrate into a balanced diet, promoting weight management and improved metabolic health. Therefore, the effort to craft your batch is well worth it.
Customizing Your Bars for Specific Dietary Needs
Whether you’re avoiding gluten, embracing veganism, or cutting carbs, you can easily tailor homemade protein bars to fit your dietary restrictions.
If you need gluten-free options, substituting traditional flours with almond or oat flour keeps things simple and healthy.
For vegan and low-carb preferences, swapping out dairy and high-carb ingredients with plant-based proteins and natural sweeteners ensures your bars are both delicious and suitable for your diet.
Gluten-Free Options
For those with gluten sensitivities or celiac disease, crafting your own protein bars ensures they meet your dietary needs without compromising taste or texture.
Here’s how you can adapt your recipes for a gluten-free diet:
-
Choose Certified Gluten-Free Oats: Opt for oats labeled as certified gluten-free to avoid cross-contamination with wheat products.
-
Substitute with Gluten-Free Flours: Use flours such as almond, coconut, or chickpea as a binder instead of wheat flour to add protein and fiber.
-
Incorporate Seeds and Nuts: These are naturally gluten-free and offer additional protein, healthy fats, and texture.
-
Check All Labels: Especially for additives like protein powders and flavorings, ensuring they’re certified gluten-free.
These adjustments help you maintain control over your nutritional intake and enjoy delicious, safe snacks.
Vegan Ingredient Swaps
If you’re following a vegan diet, customizing homemade protein bars becomes even more exciting with plant-based alternatives.
Let’s explore these swaps to ensure you’re not sacrificing protein quality or taste. Instead of whey or casein, opt for pea or rice protein powders; both are excellent for muscle repair and are easily digestible.
For binding, ditch the honey and use agave syrup or mashed bananas which offer natural sweetness and sticky texture.
Swap out dairy milk with almond, soy, or oat milk—they’re great for adding creaminess.
Finally, consider incorporating chia or flax seeds soaked in water as an egg substitute to enhance the fiber content.
With these choices, you’ll craft a nutritionally robust, cruelty-free protein bar that aligns with your lifestyle.
Low-Carb Alternatives
Adapting your homemade protein bars to suit a low-carb diet can significantly enhance your meal plan without compromising taste. Here’s how you can make the shift:
-
Replace traditional flours: Use almond or coconut flour instead of regular flour to cut down on carbs without losing texture.
-
Opt for low-carb sweeteners: Choose stevia, erythritol, or monk fruit sweetener instead of honey or maple syrup for a sweet taste with fewer carbs.
-
Incite with high-fiber add-ins: Integrate chia seeds or flaxseeds, which offer fiber that aids in keeping the net carb count lower.
-
Select lean proteins: Utilize whey or pea protein isolates which are lower in carbs than some other protein forms, optimizing your bar’s protein content efficiently.
Storing Your Homemade Protein Bars
While homemade protein bars offer convenience and nutrition, proper storage is essential to maintain their freshness and texture.
You’ll want to store your bars in a cool, dry place. The pantry is ideal, but if you’ve used fresh ingredients or live in a humid climate, the refrigerator may be better.
To prevent them from sticking together, wrap each bar individually in parchment paper before placing them in an airtight container. This method also makes it easy to grab one on the go.
If you’ve made a large batch, consider freezing some bars. Properly stored, they can last a few days at room temperature, up to two weeks in the fridge, or several months frozen.
Just remember to thaw frozen bars before enjoying.
Pairing Your Protein Bars With Other Healthy Snacks
Pairing your homemade protein bars with other healthy snacks can enhance both their flavor and nutritional benefits. To elevate your snacking experience, consider these combinations:
-
Fresh Fruits: Combine slices of apples or bananas with your protein bars for added vitamins and natural sweetness.
-
Greek Yogurt: Dip your protein bar pieces into Greek yogurt to incorporate probiotics and extra protein.
-
Nuts and Seeds: Mix a handful of almonds or sprinkle chia seeds over your bar for a crunch that boosts essential fatty acids.
-
Vegetable Sticks: Enjoy your bars with carrot or celery sticks for an increase in dietary fiber and to maintain a balanced nutrient intake.
These pairings not only improve taste but also optimize your nutritional gains from each snack session.
Creative Recipes to Try
If you’re eager to expand your culinary horizons, why not experiment with these creative protein bar recipes?
Dive into a tropical delight with Mango Coconut Protein Bars. You’ll blend dried mango, unsweetened coconut flakes, oats, and vanilla protein powder for a refreshing, chewy snack.
Push the boundaries further with Espresso Almond Bars. Mix crushed almonds, chocolate protein powder, and a shot of espresso to boost your energy levels dramatically.
Explore savory with a Rosemary and Fig Protein Bar. This unique combination involves dried figs, rosemary, and a hint of lemon zest, merging sweet with aromatic in a satisfying crunch.
Each recipe is designed for sophistication and flavor, transforming your protein bar experience from mundane to gourmet.
Frequently Asked Questions
Can I Substitute Whey Protein With a Plant-Based Protein?
You can substitute whey protein with a plant-based option. Nearly 65% of people are lactose intolerant, making plant proteins like pea or rice a digestible alternative. Ensure you adjust flavors accordingly for taste.
Are Homemade Protein Bars Safe for Children?
Yes, you can safely include homemade protein bars in your child’s diet, provided you use child-friendly ingredients and avoid common allergens like nuts. Always check for any dietary restrictions specific to your child.
How Long Do Homemade Protein Bars Last Outside the Fridge?
Your homemade protein bars typically last about a week outside the fridge if stored in a cool, dry place. For longer preservation, you’d want to refrigerate them, where they can stay fresh for months.
Can I Add Caffeine to Protein Bars for Extra Energy?
Yes, you can add caffeine to your protein bars for an energy boost. Just ensure you’re aware of the dosage to avoid excessive intake, especially if you consume other caffeinated products daily.
Are These Protein Bars Suitable for Weight Loss Diets?
Yes, these protein bars can be suitable for weight loss diets if they’re low in sugar and high in fiber and protein. Make sure to check the calorie content to fit your dietary goals.