Handcrafting Delicious Protein Bars- A Step-by-Step Guide!
To handcraft delicious protein bars, start by choosing quality ingredients like whole grains, nut butters, and natural sweeteners. Prepare a clean workspace with the right tools for mixing. Combine dry and wet ingredients, then add seeds, nuts, or dried fruits for extra flavor. Firmly press the mixture into your mold and refrigerate to achieve the perfect texture. Store your bars in airtight containers or freeze them for longer freshness. You’ll discover even more tips to enhance your snack game!
Key Takeaways
- Choose high-quality base ingredients like whole grains or nut butters, and incorporate natural sweeteners for optimal flavor and nutrition.
- Measure ingredients accurately and mix thoroughly in a large bowl to ensure a consistent base without clumps.
- Use an appropriate mold, pressing the mixture firmly for density, and chill the bars for at least two hours to meld flavors.
- Cut the bars into individual portions and store them in airtight containers to maintain freshness and prevent moisture.
- Experiment with different textures and presentation techniques to enhance enjoyment and make healthy snacking more appealing.
Choosing the Right Ingredients
When you’re deciding on the right ingredients for your protein bars, it’s essential to prioritize quality and nutrition. Start with a base of whole grains or nut butters to establish a solid foundation.
Opt for natural sweeteners like honey or maple syrup instead of refined sugars to maintain a healthier profile. Incorporate high-quality protein sources, such as whey or plant-based proteins, to guarantee your craft bars deliver on their promises.
Don’t forget to add functional ingredients like seeds, nuts, or dried fruits for texture and additional nutrients. With each choice, think about flavor, protein content, and overall health benefits. Easy Homemade Protein Bars can inspire a variety of flavors and textures to suit your preferences.
Striking this balance will elevate your craft bars, transforming them into a nutritional powerhouse you can be proud of.
Preparing Your Workspace
Once you’ve chosen your ingredients, it’s time to prepare your workspace. A clean, organized area will enhance your efficiency and creativity during the bar-making process.
Here are three essential steps to set up:
-
Clear Surface: Remove clutter from your countertop, ensuring you have ample space for mixing and assembling.
-
Gather Tools: Assemble all necessary tools and utensils—mixing bowls, spatulas, measuring cups, and a baking dish—so they’re easily accessible.
-
Sanitize: Wipe down surfaces and tools with a food-safe cleaner to eliminate any potential contaminants.
Creating a tidy area not only promotes a smoother process but also ensures you have a safe environment for making your homemade snacks, as clean workspaces reduce contamination risks. With your workspace properly prepared, you’ll be ready to focus on mastering the art of crafting delicious protein bars without distractions.
Now, you’re one step closer to creating something amazing!
Mixing the Dry Ingredients
Mixing the dry ingredients is an essential step in crafting protein bars that not only taste great but also have a perfect texture.
Begin by measuring your key ingredients accurately—protein powder, rolled oats, and any additional powders like cocoa or superfoods. Use a large mixing bowl for ample space. Stir these ingredients together thoroughly with a whisk or spoon, ensuring an even distribution of flavors.
Pay attention to clumps; breaking them down helps achieve a consistent base. If you’re adding sweeteners or spices, incorporate them at this stage, too.
This uniformity is key to a harmonious blend, resulting in protein bars that not only deliver in nutrition but also in taste and mouthfeel. Master this step for the best results! Additionally, consider using minimal ingredients to keep your protein bars simple and nutritious.
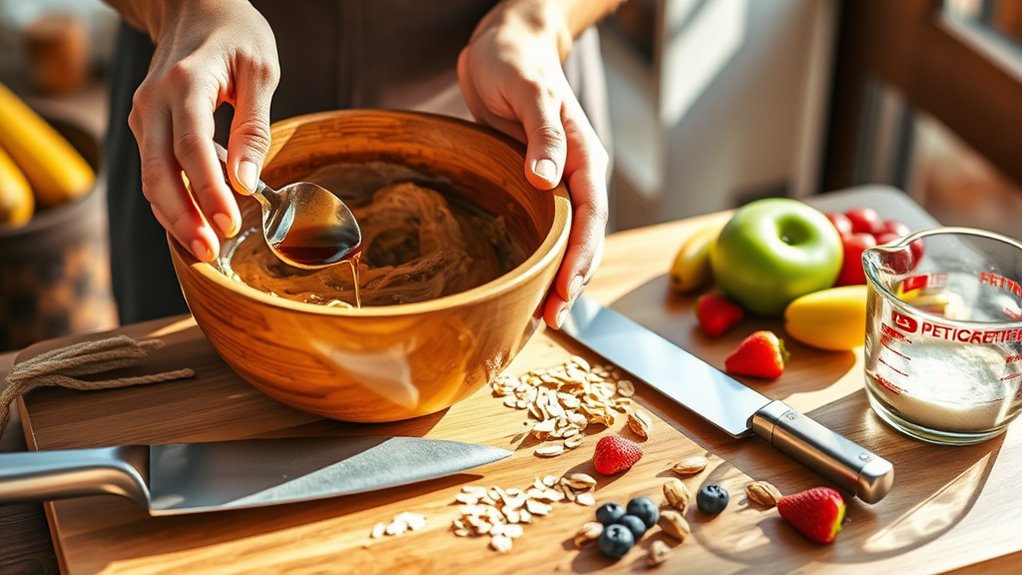
Combining Wet Ingredients
Now that you’ve mixed your dry ingredients, let’s move on to combining the wet ones.
Choosing the right liquids can make all the difference in flavor and texture. In addition to traditional options like honey and nut butter, consider exploring homemade protein bars to boost the nutritional profile of your snacks. You’ll also want to master a few mixing techniques to guarantee everything blends smoothly.
Choosing the Right Liquids
How do you choose the right liquids for your protein bars? Selecting the appropriate wet ingredients is essential for texture, flavor, and nutrition.
Consider these three key factors when picking your liquids:
-
Consistency: Choose liquids that won’t overpower your mixture. Almond milk or oat milk can provide moisture without making your bars too sticky.
-
Flavor: Think about the overall taste. Vanilla extract or maple syrup adds sweetness and complements other ingredients.
-
Nutritional Content: Opt for nutrient-rich options like nut butters or Greek yogurt for added protein and healthy fats.
Mixing Techniques Explained
Achieving the perfect blend of wet ingredients is essential for your protein bars’ overall texture and flavor. Start by measuring your liquids accurately; consistency in volume leads to success.
Combine heavier ingredients, like nut butters, with lighter ones, such as honey or maple syrup. Use a sturdy mixing bowl and a spatula or electric mixer for even incorporation.
If you’re adding flavors or liquids like vanilla extract or almond milk, pour them in gradually, giving your mixture time to absorb and blend. Don’t rush this step; thoroughly mix until it’s smooth and homogeneous.
A well-mixed wet base guarantees that all dry ingredients will evenly stick together, creating a delectably chewy and flavorful bar that’ll impress even the toughest critics.
Incorporating Add-ins for Flavor
While crafting your own protein bars, adding flavorful ingredients can elevate your snacks to a whole new level.
Experimenting with well-chosen add-ins not only enhances taste but also boosts nutrition. Here are three add-in categories you should consider:
-
Nuts and Seeds: Almonds, walnuts, or chia seeds add crunch and healthy fats that keep your bars satisfying.
-
Dried Fruits: Raisins, cranberries, or apricots provide natural sweetness and a chewy texture, balancing the protein-rich elements.
-
Flavor Extracts: Vanilla, almond, or peppermint extracts can infuse your bars with a unique flavor profile, making each bite exciting. Additionally, using natural ingredients allows for healthy customization of your protein bars.
Molding and Shaping the Bars
Now that you’ve added your favorite flavors, it’s time to mold and shape your protein bars.
Choosing the right mold can make a big difference in the final product, so consider your options carefully.
You’ll also want to explore various shaping techniques to achieve the perfect texture and size.
Choosing the Right Mold
When you’re ready to mold your protein bars, selecting the right mold can make all the difference in the final product.
A good mold guarantees even shape and consistency, which are crucial for texture and taste. Here are three key factors to take into account:
-
Material: Choose silicone for easy release and flexibility, or opt for metal for durability and heat conductivity.
-
Shape: Select a mold that matches your desired bar thickness and width. Uniformity is essential.
-
Size: Verify the volume; it should accommodate your chosen recipe without overflow while allowing for proper portion control.
Shaping Techniques Explained
Selecting the right mold sets the stage for shaping your protein bars effectively. Use silicone molds for easy release and a polished finish or go with a metal pan for sturdier bars.
Once you’ve poured the mixture, press it firmly into the mold. This density guarantees the bars hold their shape and texture. You can also use parchment paper for added convenience when lifting out the bars.
For a more artistic touch, shape your bars by hand. Wet your hands slightly to prevent sticking, and form them into uniform rectangles or squares. If you prefer round shapes, consider using a cookie cutter; just be sure to keep the mixture compact.
Mastering these techniques will elevate your protein bars to gourmet status.
Refrigerating for the Perfect Texture
To achieve the perfect texture in your protein bars, refrigerating them is crucial. This step not only enhances flavor but also solidifies the structure, making them easier to handle.
Here’s how to get it right:
-
Chill Time: Allow your bars to sit in the fridge for at least two hours. This helps the ingredients meld together for a cohesive bite.
-
Storage Method: Wrap them tightly in parchment paper or use an airtight container. This protects them from moisture and keeps them fresh.
-
Check Consistency: After chilling, give one a gentle squeeze. It should hold its shape without being too hard. Achieving this balance guarantees you enjoy a perfect texture every time!
Storing Your Homemade Protein Bars
Successfully storing your homemade protein bars guarantees they stay fresh and maintain their delicious flavor. Start by cutting them into individual portions; this makes grabbing one on the go effortless.
Use an airtight container to prevent moisture from seeping in. For peak freshness, you can refrigerate your bars, which extends their shelf life considerably.
If you plan to store them for longer, consider freezing them. Wrap each bar tightly in plastic wrap or parchment paper before placing them in a freezer-safe bag.
When you want to enjoy one, simply let it thaw in the fridge overnight. With these techniques, you’ll keep your protein bars irresistible and ready whenever hunger strikes, elevating your personal snack game to mastery level.
Frequently Asked Questions
How Long Do Homemade Protein Bars Last?
They say the best things in life don’t last forever. Your homemade protein bars can stay fresh for up to a week at room temperature or up to three weeks in the fridge. Enjoy them while they’re fresh!
Can I Substitute Nut Butters for Allergies?
Yes, you can substitute nut butters with alternatives like sunflower seed butter or soy nut butter. Just guarantee the consistency and flavor balance fits your recipe, and experiment to find what you enjoy most!
Are Protein Bars Suitable for Meal Replacement?
Think of protein bars as compact powerhouses—while they can supplement meals, they shouldn’t fully replace them. For sustained energy and balanced nutrition, mix them into a broader diet, incorporating whole foods whenever you can.
What Is the Best Way to Cut Protein Bars?
The best way to cut protein bars is to chill them first. Use a sharp knife to slice through, applying even pressure. For clean edges, wipe the blade between cuts. Enjoy perfectly portioned bars every time!
Can I Freeze Homemade Protein Bars?
Yes, you can freeze homemade protein bars! Wrap them individually in plastic or foil, then place them in an airtight container. When you’re ready, just thaw them out and enjoy a healthy snack later!