How to Make Tasty Protein Bars at Home Effortlessly!
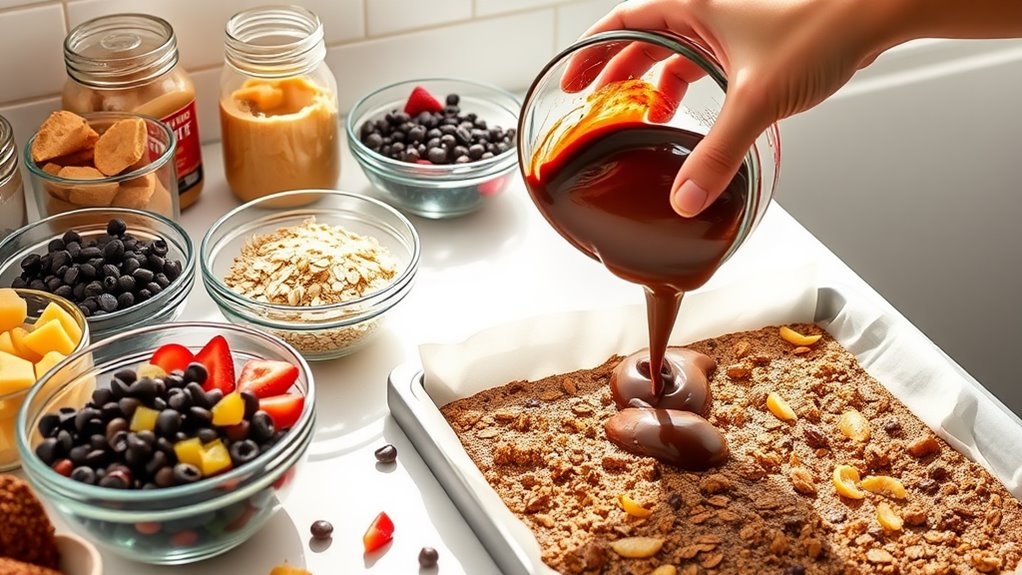
Making tasty protein bars at home is a breeze! Start by choosing a solid base like oats or nut butter, then mix in your preferred protein powder. Add sweeteners like honey or maple syrup, and toss in nutritious mix-ins such as chia seeds or dried fruits. Press the mixture into a lined dish for thick bars, or roll them into bite-sized balls. Ready to explore flavor combinations and customization tips? There’s so much more to discover!
Key Takeaways
- Start with a solid base like oats or nut butter, adding protein sources like whey or hemp seeds for nutrition.
- Use natural sweeteners such as honey or maple syrup to enhance flavor without added sugars.
- Experiment with various mix-ins like dried fruits, seeds, and chocolate chips for texture and taste.
- Choose between no-bake and baked methods depending on your time and texture preference; no-bake is quicker.
- Store bars in airtight containers or wrap individually to maintain freshness and facilitate portion control.
Benefits of Homemade Protein Bars
When you make protein bars at home, you gain complete control over the ingredients, which means you can tailor the recipes to fit your dietary needs and preferences. This flexibility allows you to create homemade bars that aren’t only nutritious but also delicious.
You can experiment with flavors and textures that store-bought options often lack. By using quality ingredients, you guarantee each bite is packed with the right protein, healthy fats, and essential nutrients you crave.
Homemade bars save you money, too, eliminating overpriced, low-quality snacks. Plus, you’ll reduce waste with less packaging.
Embracing the art of crafting your own protein bars empowers you to indulge guilt-free, all while mastering a kitchen skill that enhances your nutrition game. Additionally, making your own bars can lead to discovering exciting different flavor combinations that suit your taste preferences perfectly.
Essential Ingredients for Protein Bars
Creating your own protein bars means selecting ingredients that align with your goals and tastes.
Start with a solid base like oats or nut butters for a hearty texture. Next, add a source of protein—like hemp seeds or whey concentrate—to meet your nutritional needs.
Incorporating a sweetener, such as honey or maple syrup, can balance the flavor without sacrificing health. For added nutrients, toss in chia seeds or dried fruits for fiber and antioxidants.
To enhance texture and taste, consider including dark chocolate chips or coconut flakes. Finally, a pinch of salt can elevate all those flavors.
Additionally, using homemade snacks provides not only healthier options but also removes unnecessary additives and preservatives found in many commercial products.
Mastering these essential ingredients empowers you to customize your bars perfectly!
Choosing the Right Protein Powder
Choosing the right protein powder is vital for crafting delicious protein bars that meet your needs.
You’ll want to take into account the different types available, their flavor profiles, and any dietary restrictions or preferences you may have. A great way to enhance the nutritional value of your bars is by selecting a protein powder with minimum added sugars, which can help keep your snack healthy and energy-boosting.
With so many options, it’s essential to pick one that aligns with your goals and tastes.
Types of Protein Powders
Selecting the right protein powder can make all the difference in your homemade protein bars. You’ve got several options to evaluate.
Whey protein is a popular choice for its complete amino acid profile and rapid absorption, perfect for post-workout recovery.
Casein, a slower-digesting option, provides a steady release of protein, making it ideal for snacks or overnight fuel.
Plant-based proteins, like pea, soy, or rice, cater to vegan diets and offer varied nutritional benefits.
Each protein type alters not just the nutritional content but also the texture and flavor of your bars.
Understanding these differences empowers you to select the best fit for your dietary goals and taste preferences, ensuring your protein bars truly meet your needs.
Flavor and Sweetness Considerations
When it comes to making protein bars at home, flavor and sweetness play a significant role in their appeal. The right protein powder can transform your recipe from bland to blissful. Consider popular options that not only provide necessary nutrients but also enhance taste.
| Type of Protein Powder | Flavor Profile |
|---|---|
| Whey | Creamy, versatile |
| Pea | Earthy, slightly nutty |
| Casein | Rich, smooth |
Choose wisely according to your needs and preferences. For instance, whey can deliver a delightful sweetness with minimal effort, while pea protein might require more added flavors. By balancing flavors and sweetness, you’ll create irresistibly tasty protein bars that you’ll look forward to enjoying!
Dietary Restrictions and Preferences
How do you guarantee your homemade protein bars meet your dietary restrictions and preferences? The secret lies in choosing the right protein powder.
Start by identifying your needs: are you vegan, gluten-free, or lactose-intolerant? Select a plant-based protein like pea or brown rice powder for vegan options.
For gluten-free bars, make certain your protein powder is certified gluten-free, as cross-contamination can occur. If you have a dairy restriction, opt for whey isolate or egg white protein if they suit your diet.
Read ingredient labels carefully to avoid added sugars or allergens. Finally, consider flavors; you want a powder that complements your chosen ingredients without overpowering them.
With this guidance, you’ll create protein bars that align perfectly with your dietary preferences.
Nutritious Mix-Ins to Enhance Flavor
To elevate the taste and nutritional value of your homemade protein bars, incorporating a variety of mix-ins can make all the difference. Here are some excellent options to enhance both flavor and health benefits:
| Mix-In | Benefits |
|---|---|
| Nut butter | Adds creaminess & healthy fats |
| Dried fruits | Provides natural sweetness & fiber |
| Seeds | Boosts crunch & essential nutrients |
Experiment with ingredients like chia seeds, flaxseeds, or pumpkin seeds for added texture. You might also consider adding a splash of vanilla extract or a pinch of cocoa powder for a richer taste. By mastering the art of mix-ins, you’ll create protein bars that not only satisfy your cravings but also nourish your body. Making easy homemade protein bars at home can be a fun and rewarding experience!
Simple Steps for Mixing Ingredients
Start by gathering all your ingredients and tools to guarantee a smooth mixing process.
Confirm you have a large mixing bowl, spatula, and measuring cups at hand.
Follow these simple steps for mixing:
-
Measure Accurately: Use precise measurements for each ingredient. This confirms your protein bars have the right texture and flavor balance.
-
Combine Dry Ingredients First: Mix your dry ingredients, like oats and protein powder, thoroughly before adding any wet ingredients. This helps prevent clumping.
-
Incorporate Wet Ingredients Gradually: Slowly add in your wet ingredients, mixing as you go. This confirms even distribution and a cohesive mixture.
To enhance your protein bars, consider easy homemade protein bars that are nutritious and customizable to suit your taste preferences.
Methods for Shaping Your Protein Bars
Now that you’ve mixed your ingredients, it’s time to shape your protein bars.
You have several common techniques to choose from, and the right tools can make all the difference.
Let’s explore how to get those bars just right!
Common Shaping Techniques
Shaping your protein bars can be simple with a few effective techniques at your disposal. Mastering these methods not only enhances aesthetics but also guarantees uniformity for even nutrition.
Here are three popular shaping techniques to try:
-
Pressing: Press your mixture into a lined baking dish, using a spatula to create an even surface. This method yields thick, chewy bars.
-
Rolling: If you prefer round snacks, roll the mixture into balls or logs. This shape’s great for on-the-go enjoyment.
-
Cutting: Spread your mixture into a flat layer, refrigerate, and then cut into squares or rectangles. This offers easy portion control and a professional look.
Experiment with these techniques to find what works best for your taste and texture!
Tools for Perfect Bars
While you can achieve great results with just your hands, having the right tools makes a big difference in perfecting your protein bars.
Start with a sturdy baking pan—preferably an 8×8 inch or 9×13 inch pan—lined with parchment paper for easy removal. A silicone spatula works wonders for spreading your mixture evenly, ensuring every corner is filled.
Consider a food processor for seamlessly blending your ingredients; it saves time and enhances texture. A sharp knife or pizza cutter allows for precise slicing, enabling you to create uniform bars.
For those seeking ultimate perfection, invest in adjustable bar molds that shape your protein bars effortlessly.
With these tools, you’ll elevate your bar-making game to professional levels.
Ideal Storage Solutions for Freshness
To keep your homemade protein bars fresh for as long as possible, choosing the right storage solutions is essential. Here are three effective methods to preserve their quality:
-
Airtight Containers: Store your bars in airtight containers to prevent air exposure and moisture. This keeps them from becoming stale.
-
Freezing: If you’re making a large batch, wrap individual bars in plastic wrap and place them in the freezer. They can last up to three months!
-
Refrigeration: For shorter durations, place your bars in the fridge. This helps maintain texture and flavor without sacrificing freshness.
Customizing Your Protein Bars
When you make your own protein bars, you have the freedom to tailor them to your taste and nutritional needs. Start by selecting a base, like oats or nut butter, ensuring you achieve the right texture.
Then, play with flavors; incorporate ingredients like cocoa powder, vanilla extract, or nutmeg to elevate taste. Don’t forget about sweetness—use honey, maple syrup, or dates to satisfy your sweet tooth while considering your dietary goals.
Next, adjust the protein source—whey, plant-based, or collagen powders can all enhance the nutritional profile.
Finally, toss in extras like nuts, seeds, or dried fruits for added crunch and flavor. Keep experimenting until you create the perfect balance that meets both your palate and nutritional standards!
No-Bake vs. Baked Protein Bars
When deciding between no-bake and baked protein bars, consider how each method affects ease of preparation.
No-bake bars generally require less time and fewer steps, while baked bars can offer a different texture and flavor you might enjoy.
Let’s explore these differences to help you choose the best option for your homemade bars.
Ease of Preparation
While choosing between no-bake and baked protein bars, you’ll find that both methods offer unique advantages regarding ease of preparation. Here’s a quick comparison to help you decide:
-
No-Bake Bars: They’re simple and fast. Just mix your ingredients, press them into a pan, and refrigerate. You can enjoy your bars within an hour!
-
Baked Bars: While they require a bit more time, the process is straightforward. Mix your ingredients, pour into a baking dish, and pop them in the oven. You’ll have warm, comforting bars in about 20-30 minutes.
-
Flexibility: Both options allow you to customize flavors and textures, making the preparation not just easy, but enjoyable!
Ultimately, your choice depends on your time and preference for warm versus chilled treats.
Texture and Flavor Differences
Both no-bake and baked protein bars offer distinct textures and flavors, so your choice can greatly impact your snacking experience. No-bake bars tend to be chewy, while baked varieties are often more crumbly. Knowing these differences can help you achieve the perfect balance of taste and texture that suits your palate.
| Style | Texture |
|---|---|
| No-Bake | Chewy, dense |
| Baked | Crumbly, soft |
| Flavor | Richer, nutty |
Experimenting with different ingredients can enhance these qualities. If you prefer a quick, chewy snack, go for no-bake bars; if you like warm, crumbly textures, baked bars are the way to go. Your flavor preferences will guide your decision!
Flavor Combinations to Try
If you want to elevate your homemade protein bars, experimenting with different flavor combinations can make all the difference.
Here are three masterful pairings to inspire your next batch:
-
Chocolate Peanut Butter: Blend rich cocoa powder with creamy peanut butter for a classic, indulgent taste that keeps you coming back for more.
-
Almond Joy: Combine shredded coconut, chopped almonds, and a splash of vanilla extract to recreate that beloved candy bar flavor in a healthier form.
-
Berry Blast: Mix in freeze-dried strawberries, blueberries, and a hint of lemon zest for a revitalizing, fruity finish that brightens your protein bar.
Try integrating these combinations and watch your protein bars transform into delicious, nutrient-dense snacks!
Tips for Meal Prep With Protein Bars
Experimenting with flavors is just the beginning of making delicious protein bars; now it’s time to put them to good use with effective meal prep.
Start by making larger batches, ensuring you have a reliable supply for the week. Cut your bars into individual portions and store them in airtight containers or freezer bags; this preserves freshness and makes grab-and-go simplicity a reality.
Label your containers with dates to monitor freshness easily. Consider pairing your bars with complementary snacks, like fruit or yogurt, for balanced meals.
Ultimately, keep your protein bars in prominent spots in your kitchen or fridge, so they’re always within reach during busy days. This strategy will maximize their utility in your meal planning.
Frequently Asked Questions
How Long Can I Store Homemade Protein Bars?
You can store homemade protein bars in an airtight container for about one week at room temperature or up to three months in the freezer. Just make sure to check for freshness before enjoying them!
Can I Freeze Protein Bars for Later Use?
Yes, you can freeze protein bars for later use! Just wrap them tightly in plastic wrap or foil, then store them in an airtight container. They’ll stay fresh for about three months in the freezer.
What Can I Substitute for Nut Butter?
When life hands you nut allergies, think creatively! You can substitute sunflower seed butter, tahini, or even coconut oil. Each brings unique flavors, enriching your recipes while maintaining that creamy texture you crave.
Are Protein Bars Suitable for Kids?
Yes, protein bars can be suitable for kids if they’re made with wholesome ingredients and appropriate portions. Just check the sugar content and allergens to guarantee they’re a healthy snack option for your children.
How Can I Enhance the Texture of My Protein Bars?
To enhance your protein bars’ texture, try incorporating ingredients like oats, nuts, and seeds. Experiment with different binding agents, and consider chilling them after preparation to achieve a firmer consistency. You’ll notice a significant improvement.